Set Specific Directions
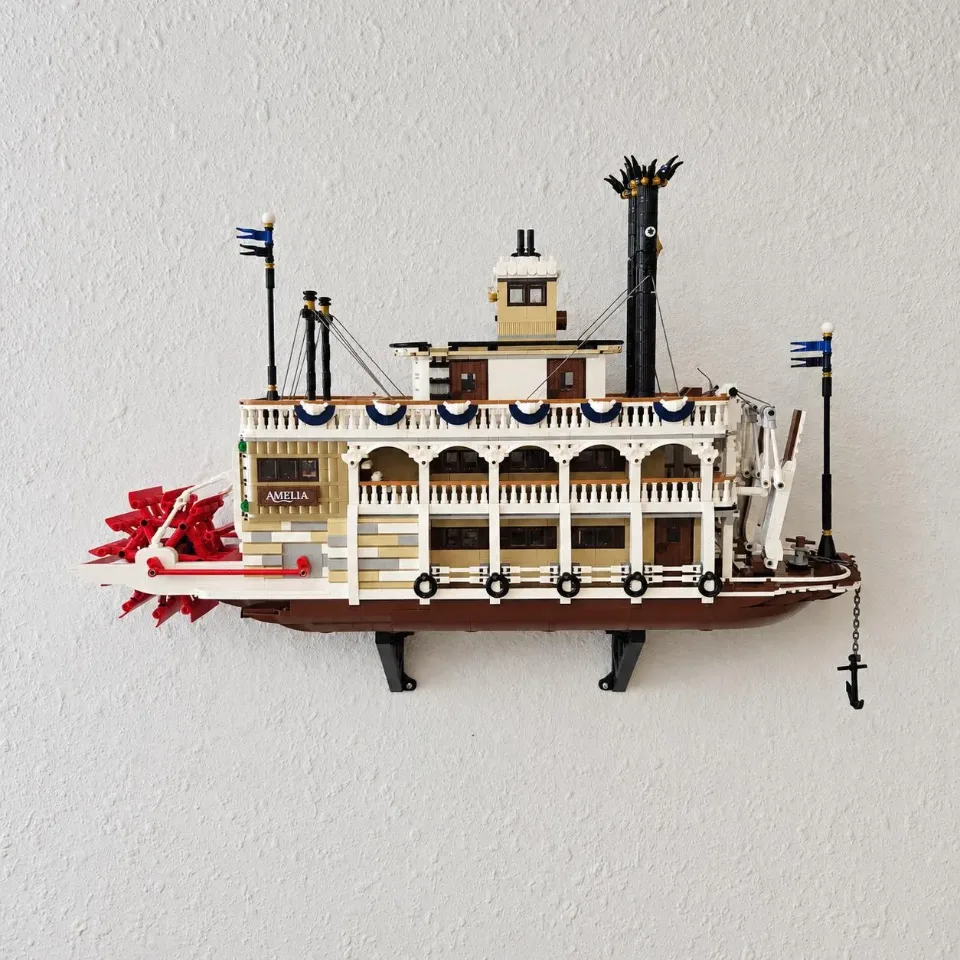
Wall Mount for LEGO® River Steamboat (21356)
Use the River Steamboat’s factory display base to identify the correct hull support locations and measure the spacing for your wall brackets. This guide covers both Bow Left and Bow Right kits, each with its own matching left and right bracket.
Reference 21356
Before you start
Tools needed
- Screwdriver
- Level
- Tape measure or ruler
- Fine-tip pencil
- Stud finder and drill, if required for your wall hardware
- Factory display base for checking support positions and spacing
Parts & hardware
- Matching left and right brackets from your Bow Left or Bow Right kit
- Yellow screw-and-anchor kit (supplied only if ordered)
SOURCE YOUR OWN HARDWARE
Need mounting hardware?
This mount uses the yellow screw-and-anchor kit. If you did not order hardware with your mount, use the specifications below to identify the recommended kit. Confirm its suitability for your wall and follow the hardware manufacturer’s installation instructions. The listed hardware rating is not a load rating for the complete printed mount.
Screws & Anchors (Yellow)
- Specifications
- 20.0-lb 1/4-in x 7/8-in Push-In Anchors with Screws
Identify your kit and display direction
Decide which direction the bow—the front of the boat—will point when viewed on the wall. Use the Bow Left kit for a left-facing bow or the Bow Right kit for a right-facing bow. Each kit contains a matching left and right bracket. Keep the pair from the same kit together and check their labels and shaped support surfaces. The two brackets support different areas of the hull, so their positions are not interchangeable.
Compare the brackets with the factory base
Before removing the boat from its factory display base, note where the base supports the underside of the hull. With help if needed, lift the boat by its supported hull and place it somewhere safe. Keep the factory base available as your positioning reference. Compare each wall bracket’s shaped top with the corresponding support position on the factory base. Orient the pair for your chosen bow direction and identify which bracket belongs at each location. The wall brackets will support the boat at those same underside locations.
Measure the support spacing
Measure the distance between the two corresponding support positions on the factory base. Choose clear, matching reference points on both supports, then identify the equivalent points on the wall brackets. For example, use support centers only if you can identify the same centers on both the base and brackets. Transfer that measurement to the bracket pair and compare their arrangement with the factory base again. Do not use the outside edges of differently shaped brackets unless those edges correspond to the points you measured. The spacing of the hull supports is what matters; the distance between wall screw holes may be different. Record your measurement and recheck it before drilling. Do not estimate spacing from a product photo.
Position the brackets and mark the wall
Choose a wall location with room for the boat’s full length, projecting details, and enough clearance above it to lift it onto and off the supports. Check for concealed services before drilling. Hold the left and right brackets against the wall in their correct positions. Set the distance between your matching reference points to the measurement from the factory base. Use a level to keep the hull support surfaces level with one another, then mark the mounting holes for each bracket. Recheck the left/right arrangement, measured support spacing, and level before preparing the holes. A helper can hold one bracket while you check the other.
Secure both brackets
Prepare the wall holes and install any required anchors according to the hardware manufacturer’s instructions. Align each bracket with its marked holes and start the screws. Check the spacing and level again, then tighten gradually with a screwdriver until both brackets sit firmly against the wall. Do not overtighten or distort the printed mounting points. Check each bracket for movement. If either shifts or rocks, correct the wall attachment before loading the mount. Confirm the final support spacing against the factory base measurement.
Lower the boat onto the supports
With help if needed, lift the Steamboat by its supported hull. Keep its weight off railings, chimneys, and other delicate details. Orient it for the bow direction of your kit and align the underside with the two shaped brackets. Lower the boat gently onto both supports at the locations you identified from the factory base. The hull rests in the shaped supports; do not press it down to force a connection. Check that it sits evenly and that the raised ends locate the hull without catching fragile pieces. Keep supporting the boat until both brackets are carrying it correctly. If it rocks, sits crooked, or misses a support, lift it off and check the bracket positions rather than shifting or forcing it while loaded.
Check the finished display
Gradually release your support only when the boat is stable. Confirm that both brackets remain firm against the wall, the hull sits correctly in both support areas, and the boat is level with clearance around its details. To remove the boat, support its hull and lift it clear of both brackets before moving it away from the wall. Remove the boat before changing bracket spacing or tightening wall screws. If you notice movement or loosening later, take the set down and check the installation before displaying it again.